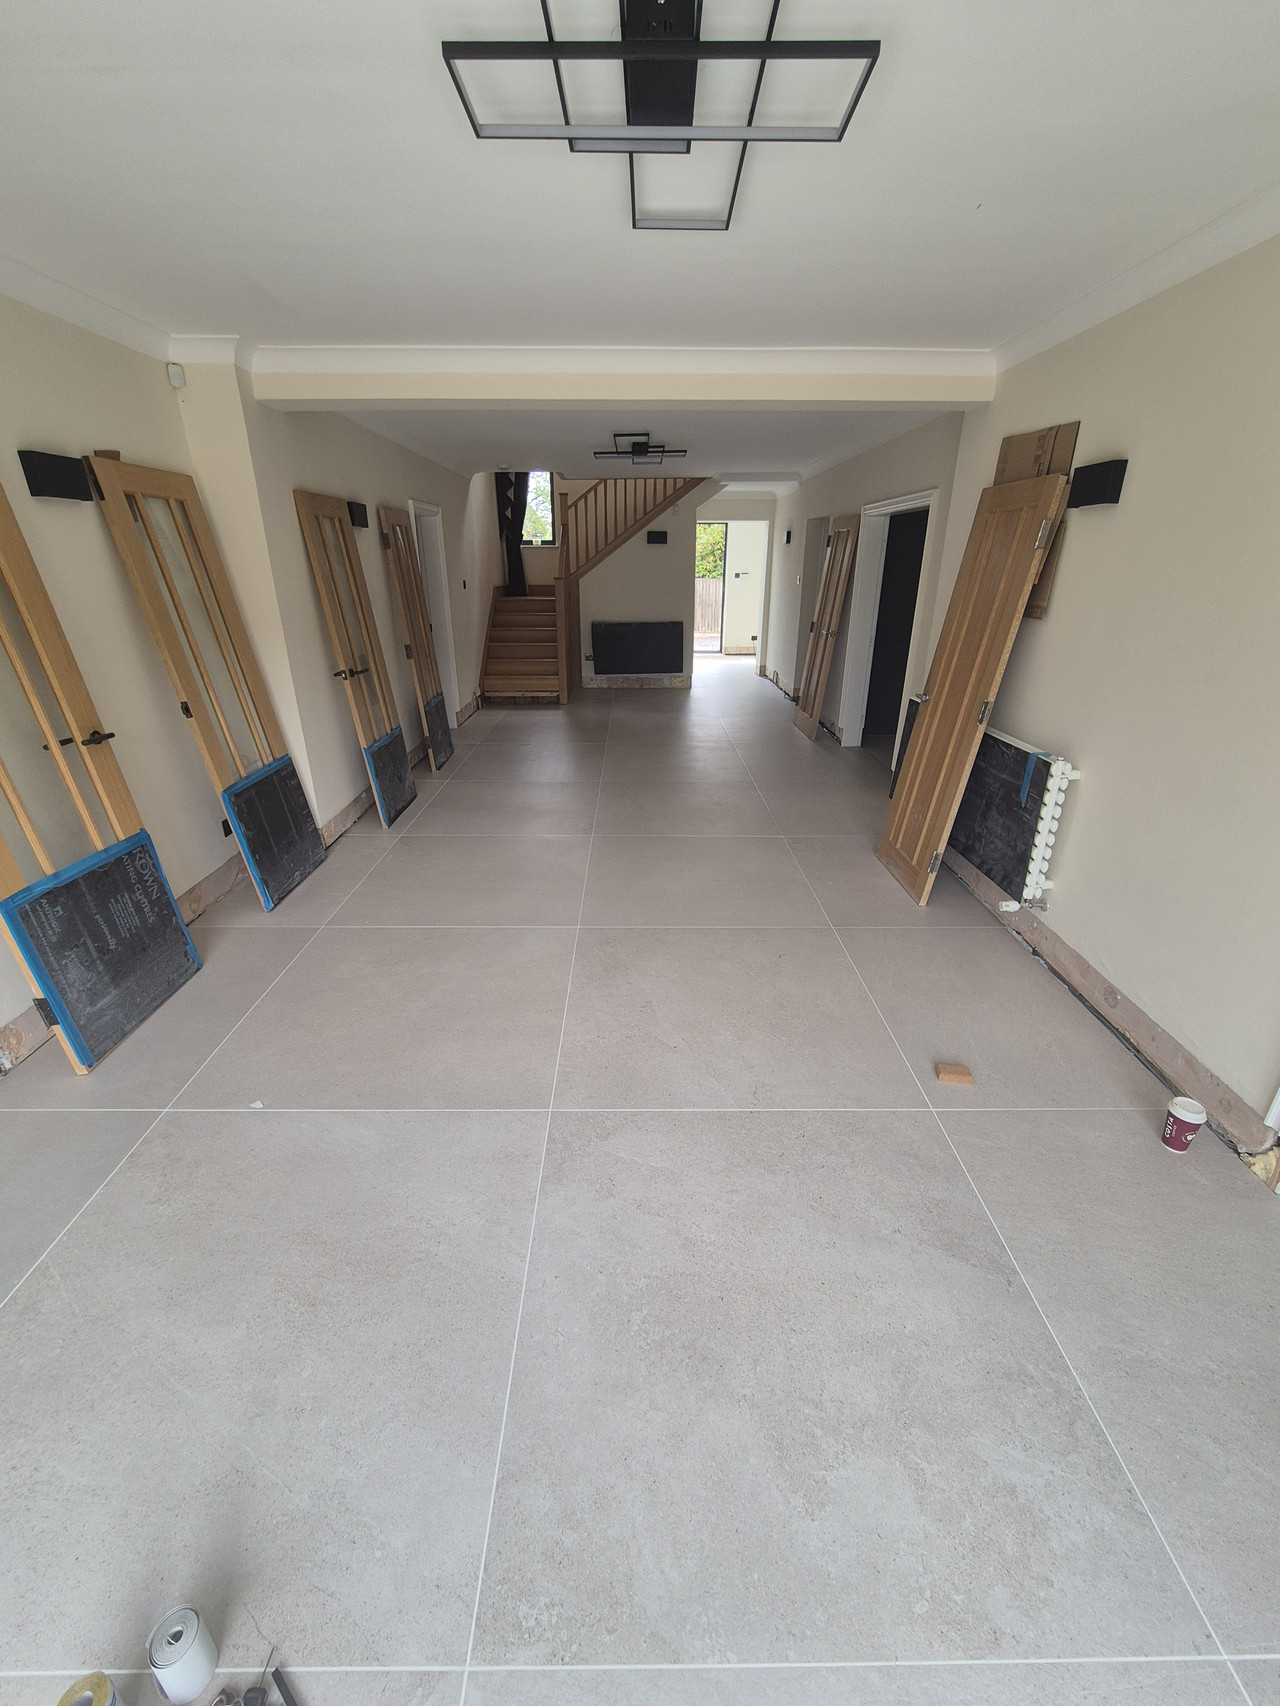
Large-Format Porcelain Floor with Structural Remedial Works
Substrate Preparation & Remedial Works • Localised Levelling • Large-Format Porcelain • UV-Resistant Polyurea Resin Grout
- Location
- Oaklands, Warrington
- Category
- Floor Tiling
- Tile type
- Large-format porcelain
- Tile size
- 1200 x 1200mm
01
The problem
A full ground-floor renovation in Oaklands, WA4. Once the existing tiled floor and adhesive were removed, the original timber floorboards were exposed and it became clear the previous installation had not been correctly overboarded. The floor was rebuilt with a stable boarded substrate, localised levelling and an anti-cracking decoupling membrane before 1200x1200 large-format porcelain was installed through the main ground-floor area.
02
Preparation
- The existing tiled floor and adhesive bed were completely removed, exposing the original timber floorboards beneath.
- Once opened up, it became clear that the previous installation had not been correctly overboarded to provide a suitable rigid tiling substrate.
- Rather than tiling back over the existing build-up, the floor was stripped back and rebuilt correctly. The timber floor was checked, strengthened where required and fully overboarded to create a stable, rigid base suitable for the new large-format porcelain.
- Localised levelling and preparation were then carried out to correct variations in the substrate and bring the different areas into a consistent plane before installation of the 1200x1200 porcelain.
03
The solution
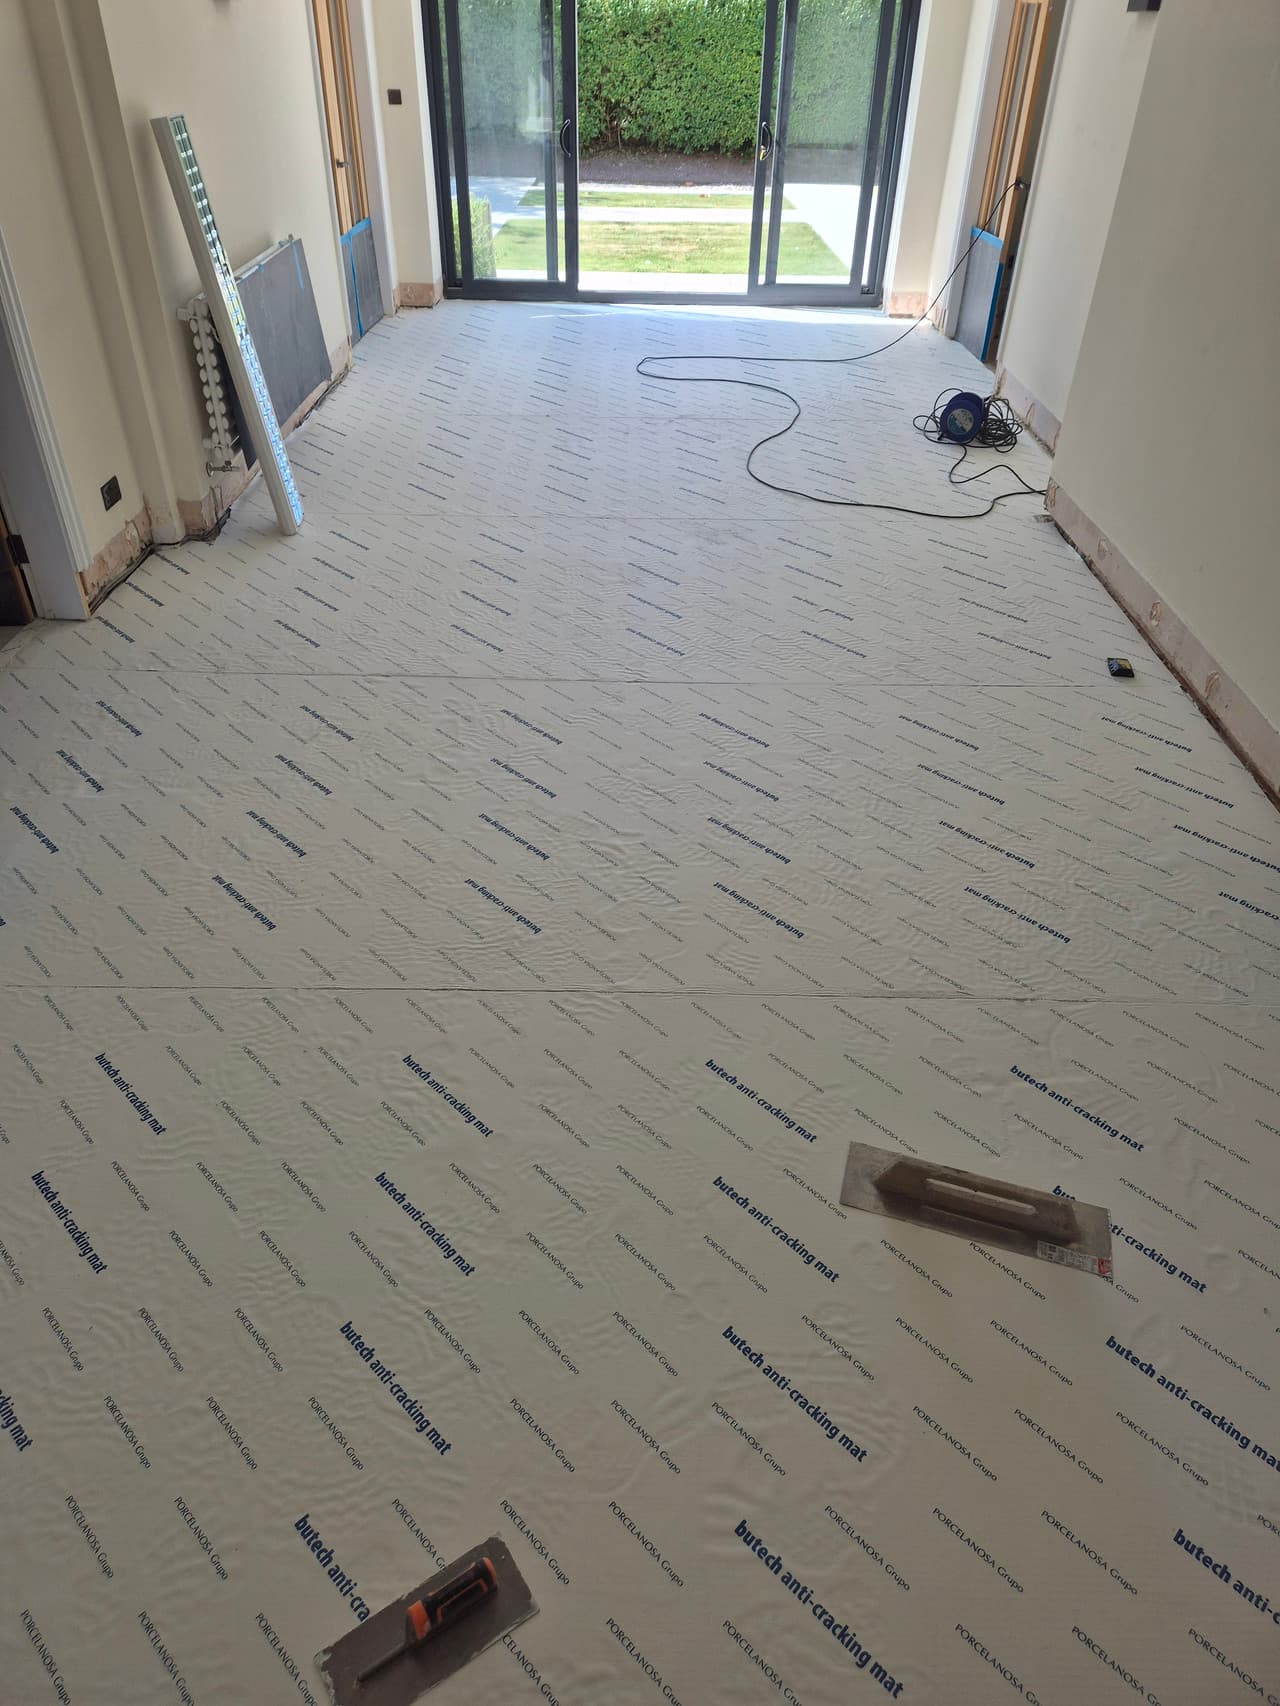
- An anti-cracking decoupling membrane was installed across the floor to isolate the porcelain from movement in the substrate below.
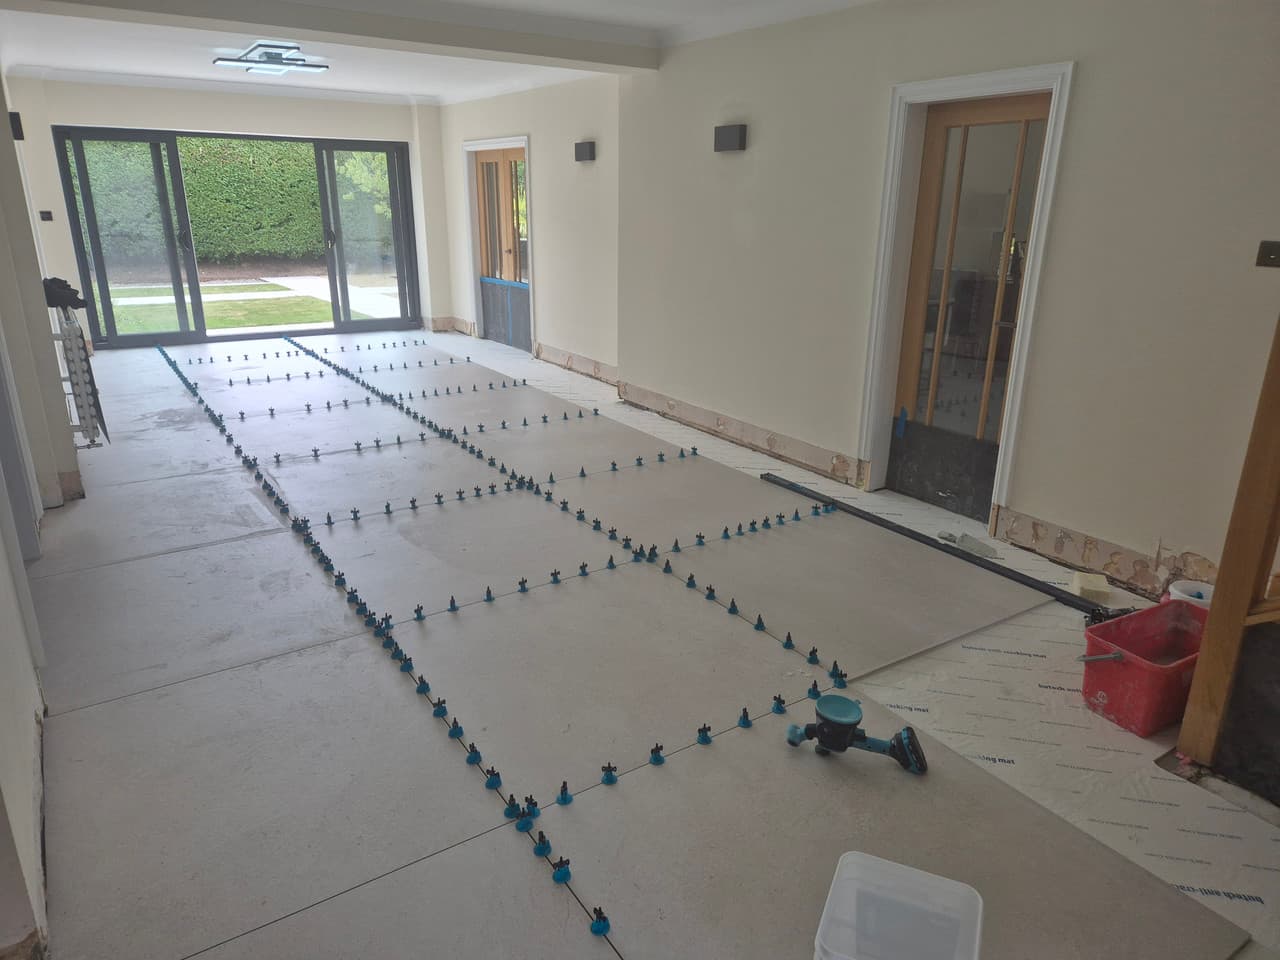
- 1200x1200 large-format porcelain was laid using a mechanical levelling clip system to eliminate lippage across the large tiles.
- Doorway transitions were formed as bespoke tiled, mitred details in place of standard trims.
- The floor was grouted with a UV-resistant polyurea resin grout for a hard-wearing, colour-stable joint.
04
The result
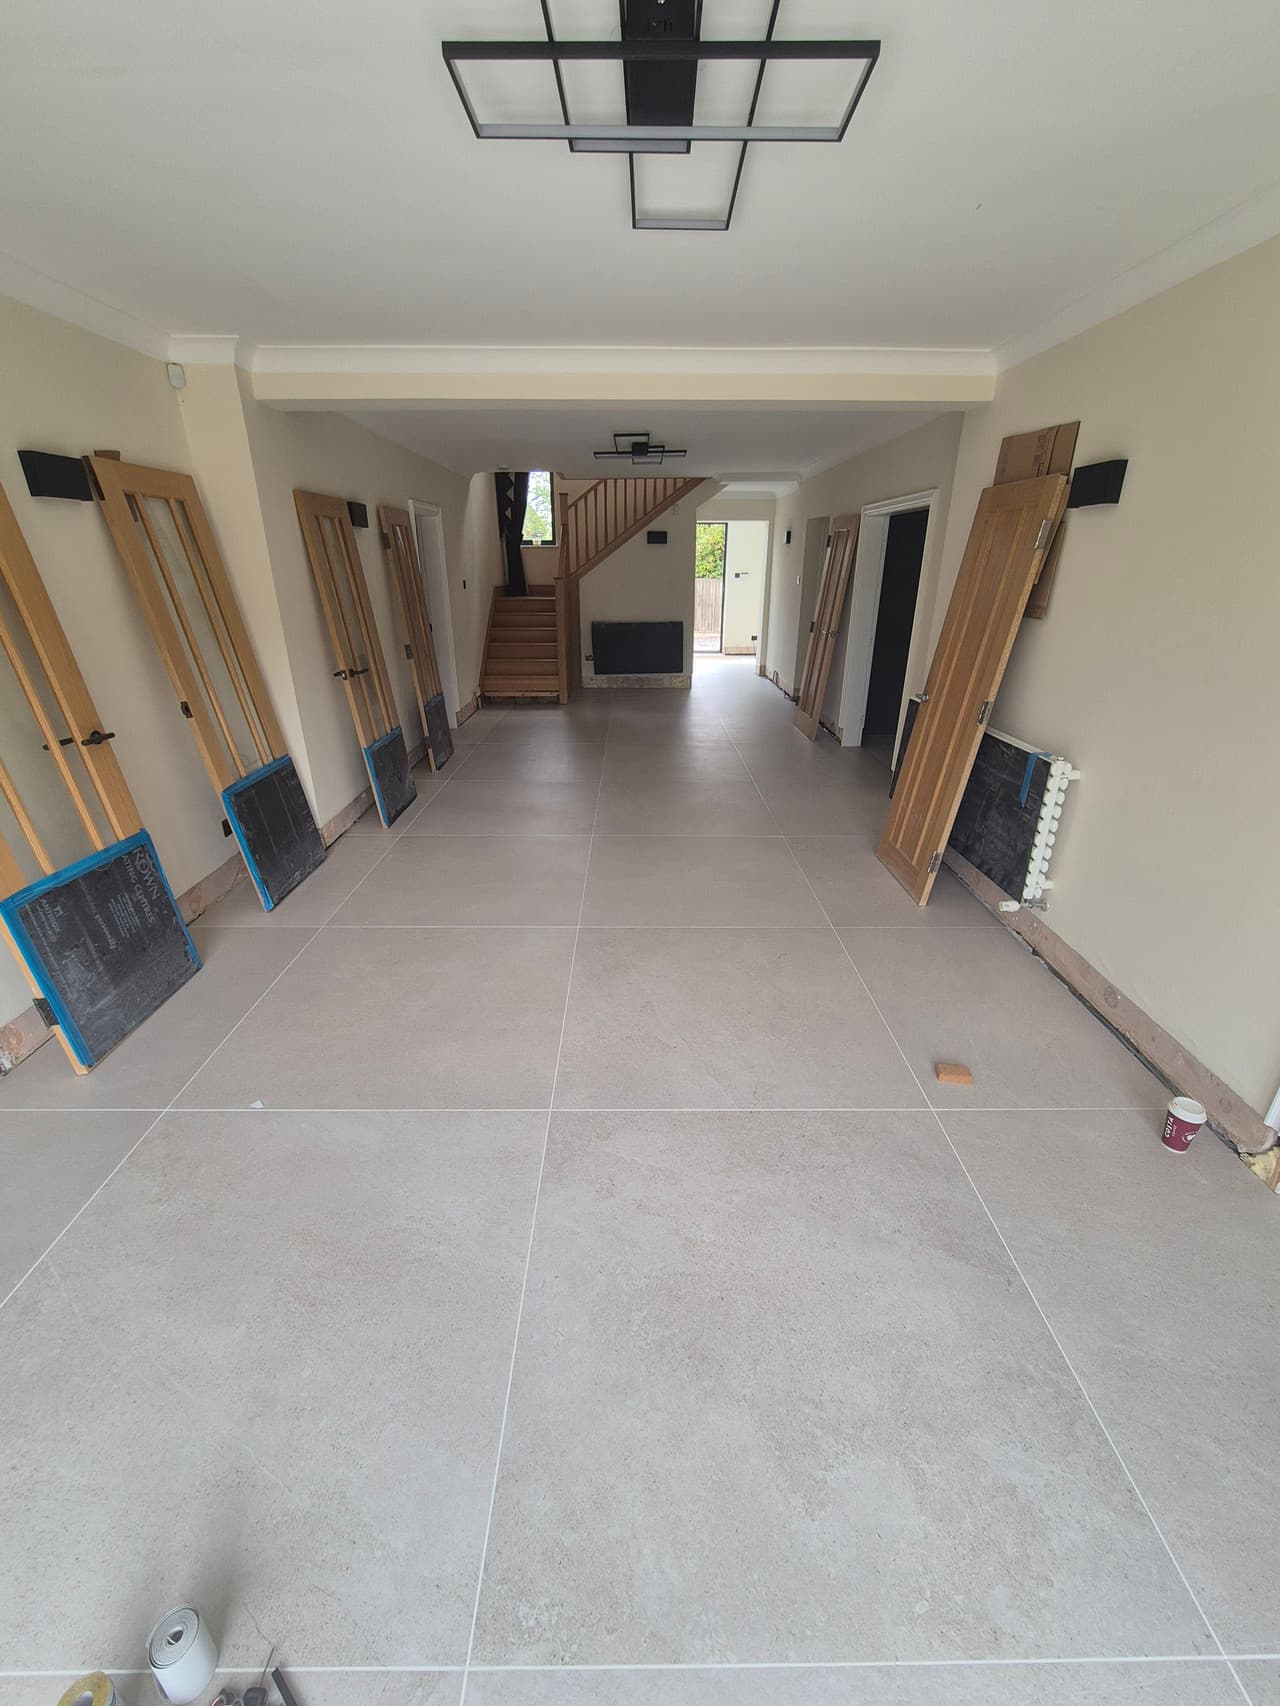
- A continuous, level porcelain floor running through the main ground-floor area with no thresholds breaking the run.
- A decoupled, properly remediated build-up designed to stay crack-free over a timber structure.
- Clean mitred doorway transitions and consistent resin grout lines throughout.
Documented installation
What was found, prepared and completed
The existing floor concealed preparation that was not suitable for the new large-format installation. These stages show what became visible after lifting, how the substrate was rebuilt and how the finished floor was installed.
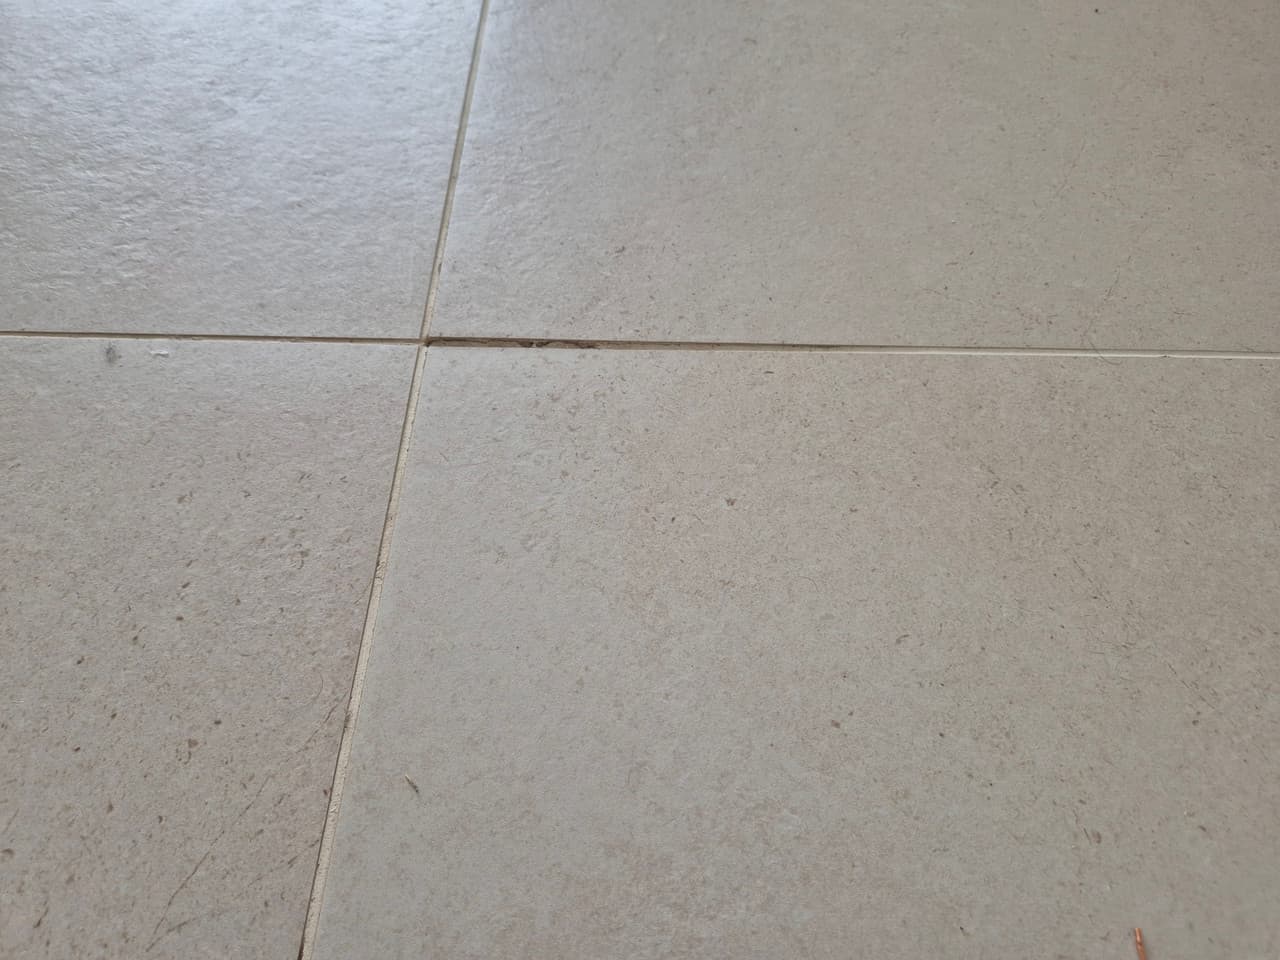
01 · Before lifting
What was visible before lifting
The existing tiled floor, in place and in use. Only the surface could be assessed at this stage.
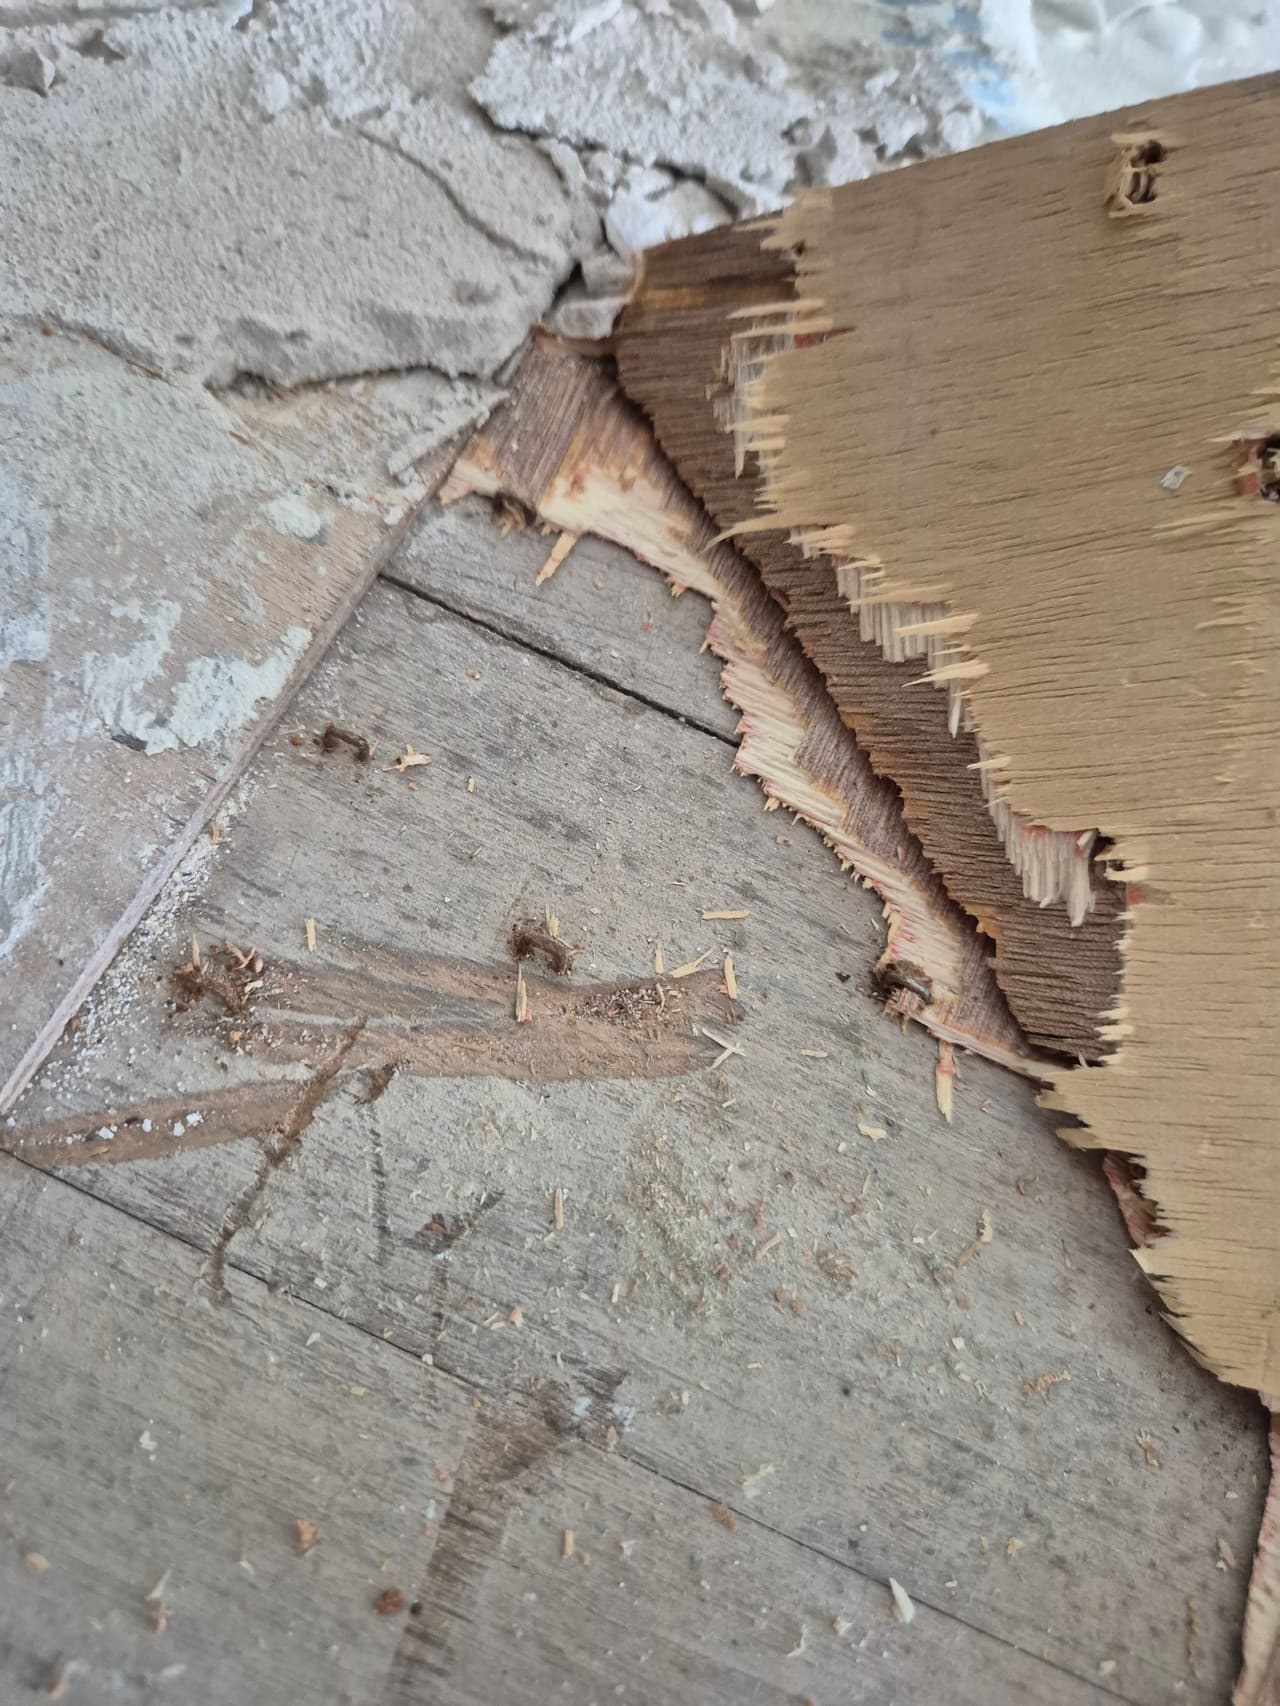
02 · Uncovered
What was uncovered
Beneath the old adhesive, the original timber floorboards. The previous installation had not been correctly overboarded for tiling.
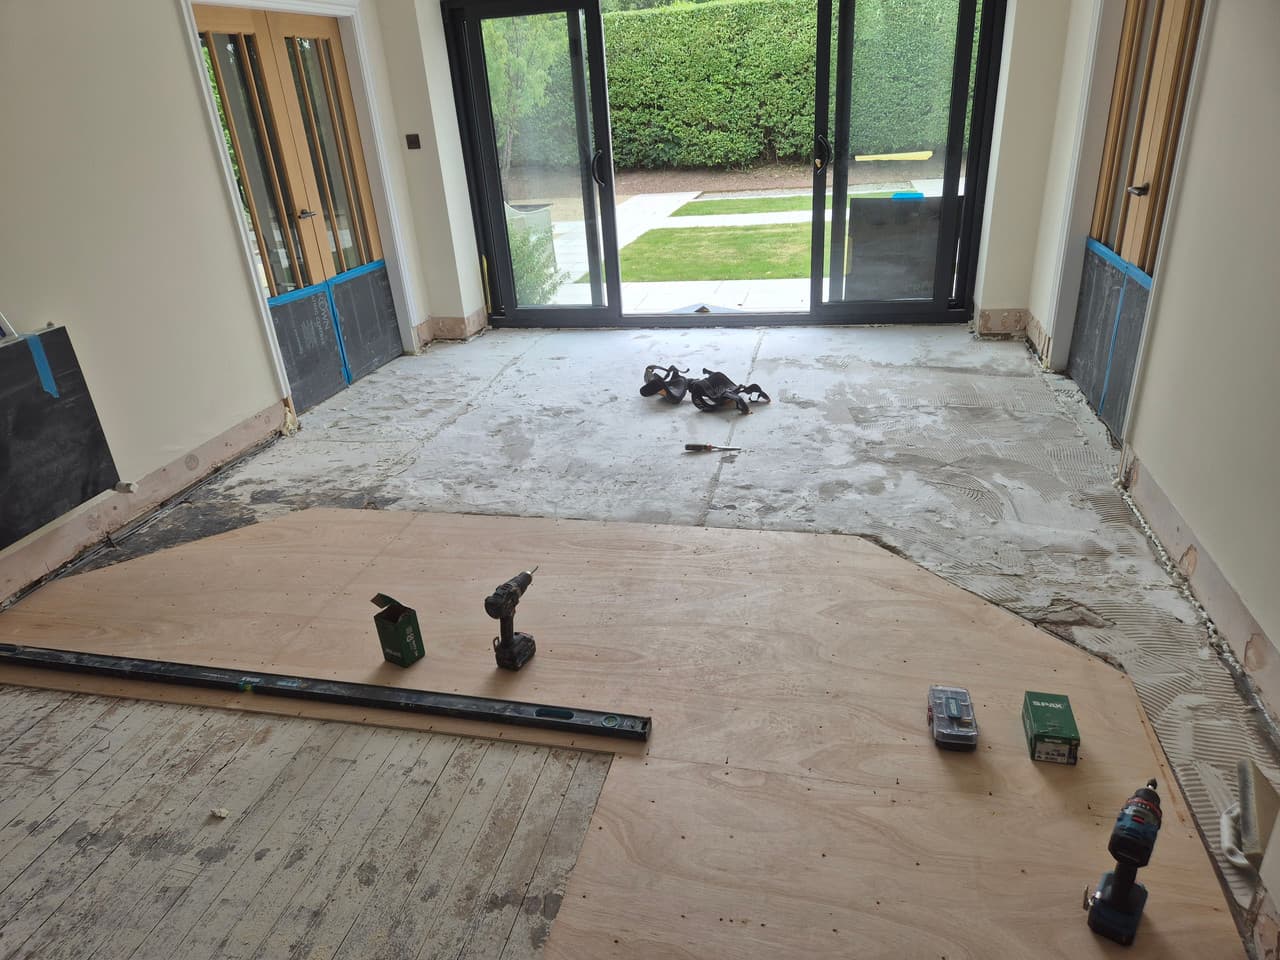
03 · Rebuilt
How the substrate was rebuilt
Timber floor strengthened where required and overboarded with new plywood, screwed down to form a stable, rigid base.
04 · Prepared
Decoupling and preparation
After localised levelling, an anti-cracking decoupling membrane was bonded across the whole floor to isolate the tiles from movement below.
05 · Installed
Large-format installation
1200 × 1200 porcelain laid over the membrane on a mechanical levelling clip system to keep every tile flush.
06 · Finished
Finished result
The completed floor running through the ground floor to the garden doors, with bespoke mitred thresholds and a UV-resistant polyurea resin grout.
How the scope changed
The original quotation covered what could reasonably be assessed with the existing floor still in place. Once lifted, unsuitable preparation was uncovered and additional remedial work was agreed. The customer also upgraded from cement grout to a UV-resistant polyurea resin grout and added further tiled areas and bespoke thresholds.
All changes were explained, documented and agreed before proceeding.
How the Job Was Done
From substrate condition through to the finished result.
Existing tiled floor before removal — the starting point across the main ground-floor area.
The old tiles and adhesive were completely removed to expose the original timber floorboards. Once opened up, it became clear the previous installation had not been correctly overboarded, so the substrate was rebuilt properly: the timber was checked and strengthened where required, fully overboarded to create a stable rigid base, locally levelled to correct variations, and then covered with an anti-cracking decoupling membrane before tiling.
1200x1200 large-format porcelain installed over the decoupling membrane using a mechanical levelling clip system to keep the large tiles flat and lippage-free across the whole floor.
The levelling clip system holds every tile flush, and doorway transitions were formed as bespoke tiled, mitred details in place of standard trims. The floor was finished with a UV-resistant polyurea resin grout for a hard-wearing, colour-stable joint.
A continuous, level porcelain floor running through the main ground-floor area with no thresholds breaking the run.
Services Used on This Project
Planning a similar specialist project?
Send the project details and a few photos. You deal directly with Paul from first message to final finish.