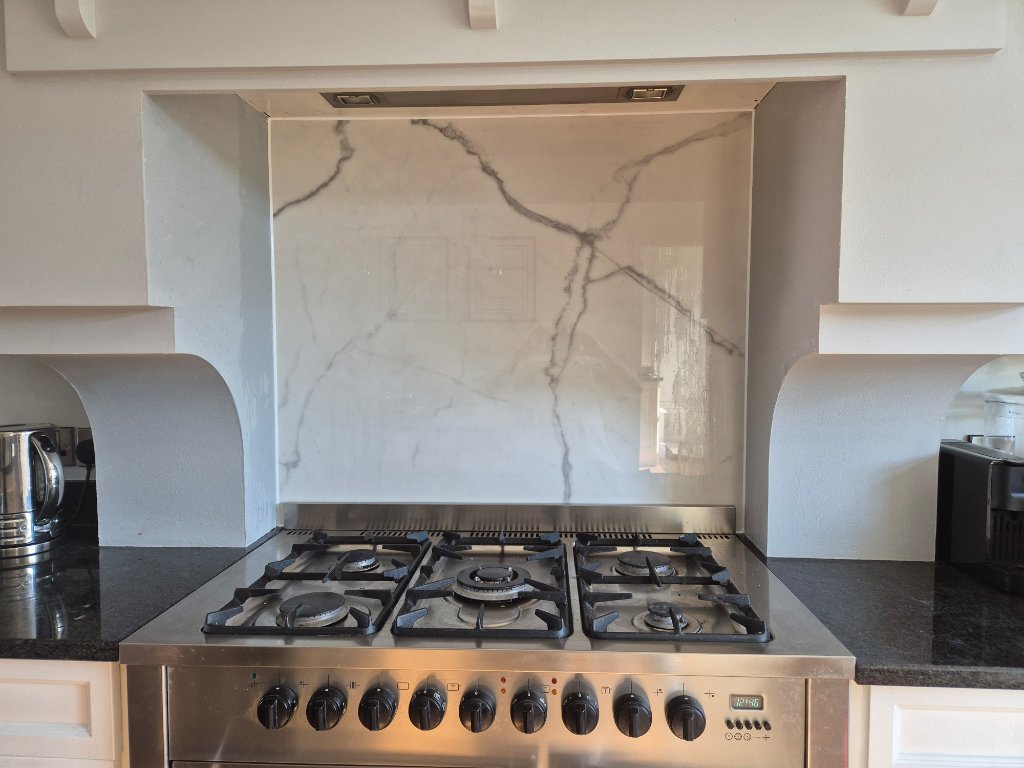
Large Format Splashback Installation
Kitchen Wall Tiling • Large Format Tiling • Wall Preparation
- Location
- Mobberley, Cheshire
- Category
- Kitchen Tiling
- Tile type
- Large-format
01
The problem
Single large format porcelain tile installed as a seamless cooker splashback in a tight kitchen alcove. Precision scribing and full adhesive coverage to achieve a clean, trim-free finish.
02
Assessment & Preparation
- Existing tiles and adhesive removed back to a solid substrate
- Wall checked for flatness and irregularities
- Surface cleaned and primed to ensure proper adhesion
- Area prepared to receive a large format tile with full coverage
03
The solution
- Tile dry-laid and marked out externally before installation
- Large format tile cut down to suit the alcove dimensions
- Edges carefully scribed to account for uneven plasterwork
- Vein direction aligned to the customer's preference
- Custom L-shaped relief cuts made so the tile could sit directly on the worktop during install
- Wall and tile both back buttered to achieve 100% adhesive coverage
04
The result
- Clean, seamless finish using a single tile with no trims
- Tight, accurate fit within the alcove despite uneven walls
- Flat, fully supported installation with no voids behind the tile
- A simple-looking result that required careful planning and precision to achieve
How the Job Was Done
From substrate condition through to the finished result.
Existing tiles removed — wall stripped back to bare substrate
Tile marked out before any cutting — vein direction agreed with the customer
Tile in place mid-installation — L-shaped relief cuts allow it to sit flush on the worktop, silicone joints to both sides
Single tile, no trims — tight scribe to the uneven walls on both sides
Services Used on This Project
"Paul was fantastic from the first contact through to completion of the job. His quality of work and professionalism are outstanding. I would highly recommend him and will use again without hesitation."
— Paul Samuel
Verified Google ReviewPlanning a similar specialist project?
Send the project details and a few photos. You deal directly with Paul from first message to final finish.