Why Wetrooms Fail (And How to Avoid It)
Wetrooms are increasingly popular — the seamless look, the accessibility, and the space they create. But they're also one of the most common installations to fail if they're not done properly.
I've seen plenty of failed wetrooms in Warrington and Cheshire homes — in Altrincham, Lymm, Stockton Heath, and further across the region — and almost every failure comes down to one thing: poor preparation and inadequate waterproofing.
For homeowners in Warrington and Cheshire considering a wet room, understanding why these installations fail is the most important thing you can do before hiring anyone. Start with the wet room specialist guide and the wet room installation page to understand what a proper installation involves from start to finish.
Also read about the importance of tile subfloor preparation — the substrate is just as critical as waterproofing in these installations.
Why Wetrooms Are High-Risk Areas
A wetroom is essentially a room where water flows freely across the floor. Unlike a traditional bathroom where the shower enclosure contains water, a wetroom depends entirely on:
- Proper substrate preparation
- Complete waterproofing (tanking)
- Correct falls and drainage
- Professional grouting and sealing
Get any of these wrong, and water finds its way behind the tiles, under the substrate, and into the structure of your home. I'd recommend also reading about epoxy grout vs cement grout — using the wrong grout type in a wet room is one of the most common mistakes I see. For more on premium epoxy grout installations, see the epoxy grout service page.
Common Causes of Wetroom Failure
1. Poor Waterproofing (Tanking)
The most common failure. Many installers skimp on tanking or use inadequate products. Waterproofing must be seamless, overlap properly, and cover all vulnerable areas including corners, walls, and any penetrations.
Here's a real Didsbury wetroom project showing the waterproofing and tiling stages before the finished result.
2. Incorrect Falls
Water needs to flow to the drain. If the floor isn't sloped correctly (typically 1 in 60 gradient), water pools and seeps into areas it shouldn't.
3. Inadequate Substrate Preparation
The base layer matters enormously. Concrete floors need to be strong, level, and free from cracks. Timber floors need proper support and movement control — something I cover in detail on the self-levelling floors page. Getting the substrate right before waterproofing begins is non-negotiable.
4. Cheap or Incorrect Materials
Grout in a wet room needs to be suitable for the environment and installed to the manufacturer's specification. High-performance cementitious grouts can be appropriate, while epoxy is a premium low-absorption option where extra stain resistance and easier cleaning are wanted. Neither replaces the waterproofing system behind the tiles. See the premium epoxy grout service for where I use it.
5. Poor Coordination with Other Trades
Wetrooms often involve plumbers, electricians, and other specialists. If they're not coordinated properly, penetrations aren't waterproofed correctly, and the whole system fails.
Real Examples — Wet Room Preparation in Practice
These photos show exactly what proper wet room preparation looks like before a single tile goes down.
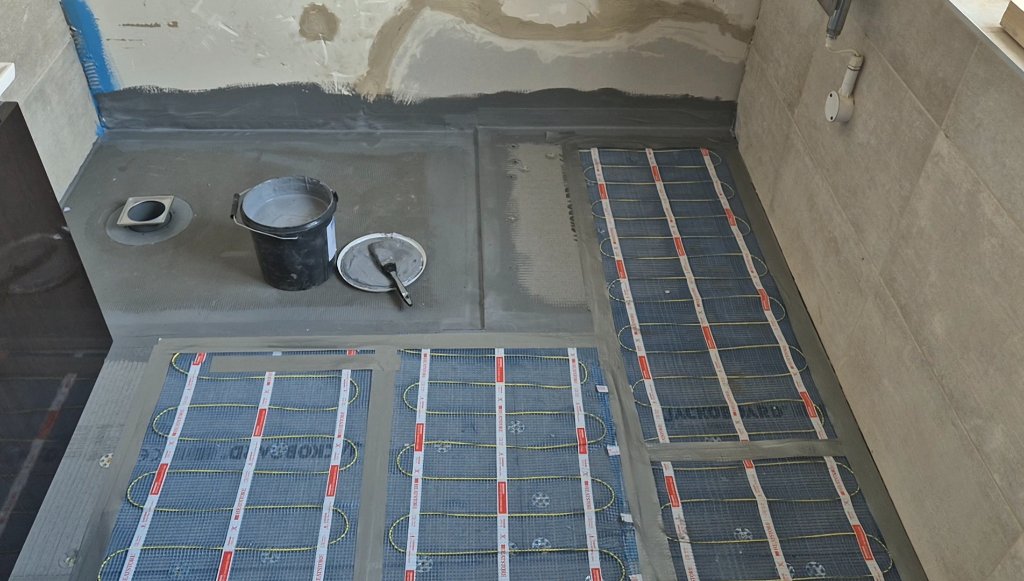
Floor preparation with underfloor heating matting and tanking applied to walls and floor. The drain is correctly positioned before tiling begins.
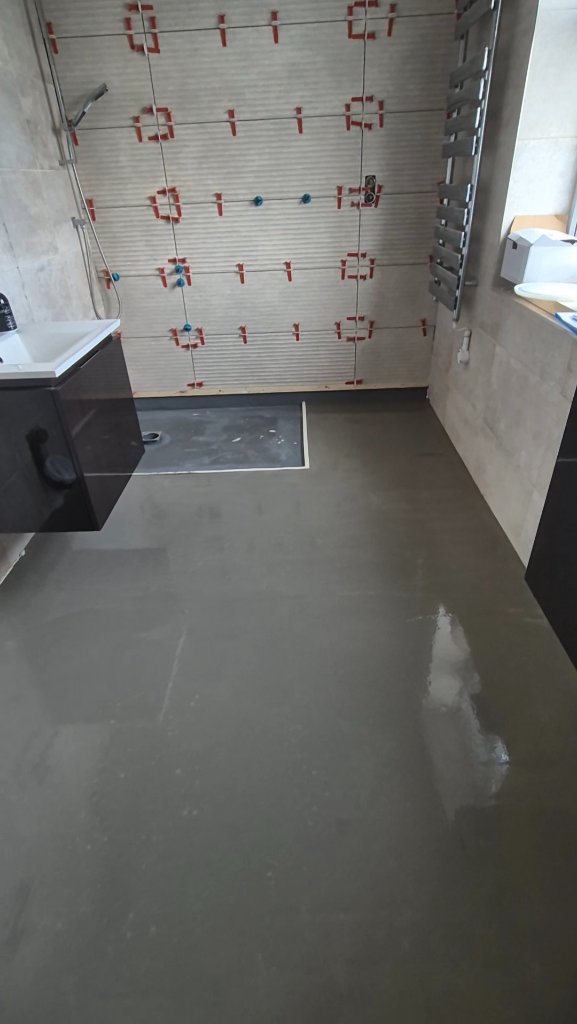
Levelled screed with correct fall to the linear drain. Levelling clips on wall tiles in progress — the floor is being prepared with the drain flush to the finished tile surface.
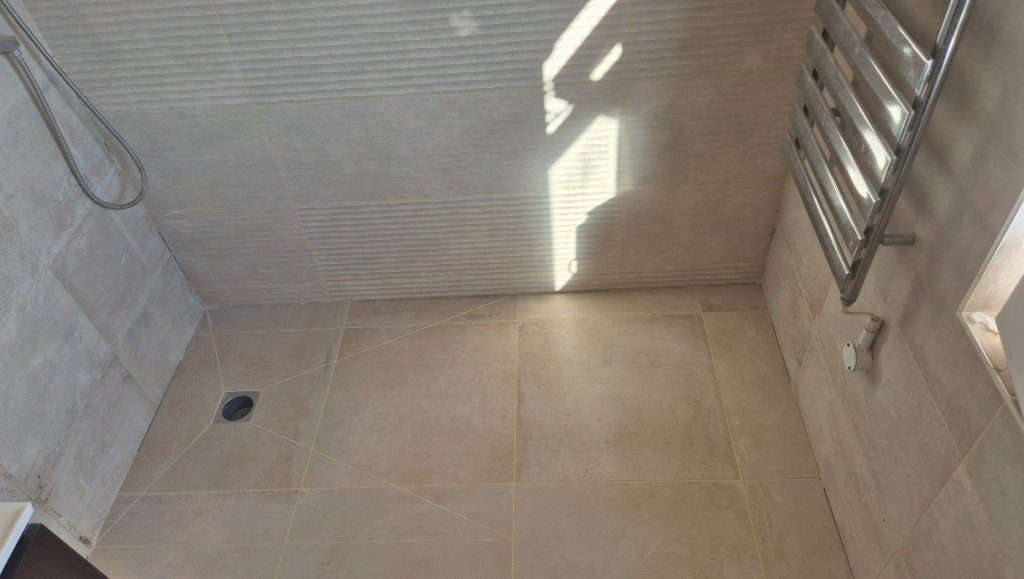
Finished wet room floor viewed from above — correct fall to drain, large-format tiles, consistent joints throughout.
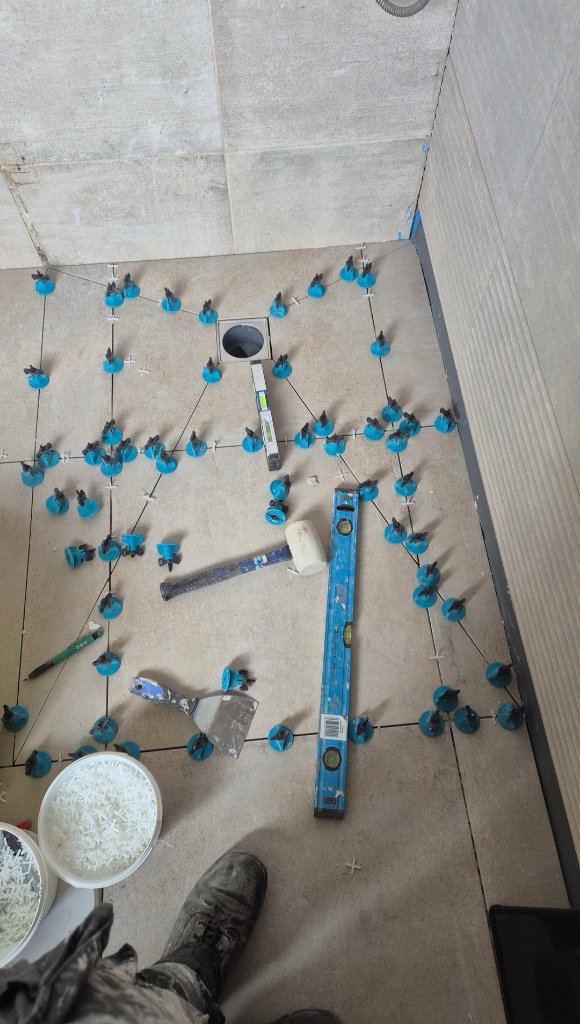
Levelling clips in use on the wet room floor around the drain. Every tile held at the correct height while adhesive cures — essential for water flow and a lippage-free finish.
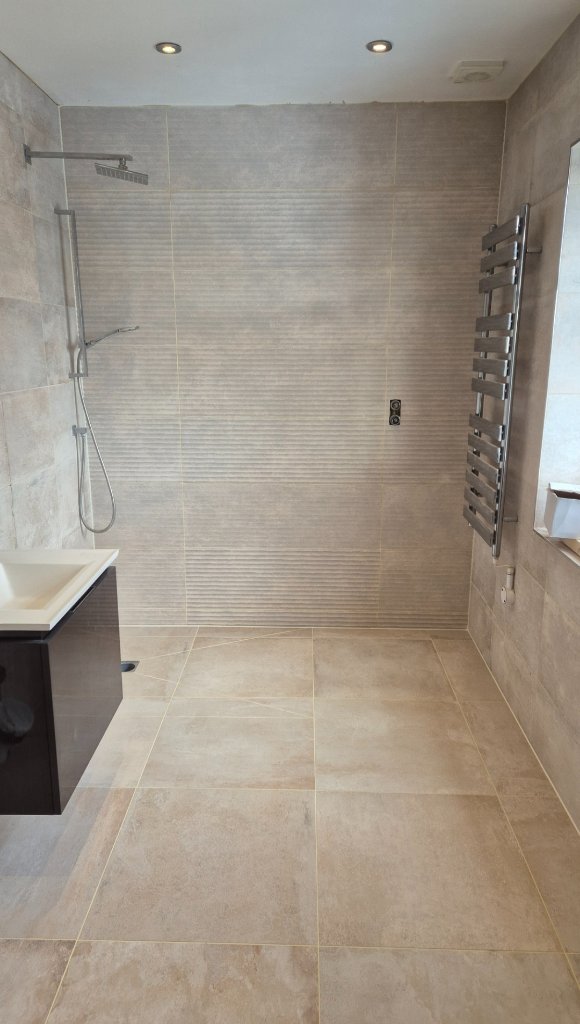
The finished result — properly prepared, fully tanked, correctly drained. This is what a wet room should look like.
A Real Example — Warrington Wet Room Floor Rebuild
A recent Warrington wet room started with cracked grout and a floor that could be felt moving. Opening the installation showed isolated adhesive pads, unsupported voids and waterproofing that did not continue across the full floor.
That documented rebuild — investigation, substrate work, full-floor waterproofing and retiling — is written up as a public Warrington case study. It is a clearer example of why surface repairs are the wrong answer once the construction underneath has failed.
This is a pattern I see regularly across Warrington and Cheshire — homeowners paying twice because the first installation wasn't done properly. See the wet room specialist guide and bathroom tiling in Cheshire for how I approach bathroom and wet-area work across the region.
How to Avoid Wetroom Failure
Start with the Right Substrate
Choose a solid base layer. Concrete is ideal. If using wood, ensure it's properly supported and won't move. Self-levelling floor preparation is often required before any waterproofing begins.
Apply Proper Waterproofing
Use a professional-grade tanking system. This should be applied to all floor surfaces and walls to a minimum height of 150mm. All corners, joints, and penetrations must be sealed.
Get the Falls Right
Ensure the floor slopes correctly towards the drain. This isn't something to guess at — it needs careful planning and execution.
Use Epoxy Grout
Standard cement grout isn't suitable. Epoxy grout is waterproof, won't degrade, and handles the constant moisture of a wetroom.
Professional Installation
This is a job for someone who understands the complexities. Cutting corners on a wetroom is expensive later.
The Long-Term View
A properly installed wetroom can last decades. A poorly installed one might fail within a few years, leading to water damage, mould, and structural problems that are far more costly to fix.
The right preparation and materials aren't cheap, but they're essential insurance against future problems.
If you're planning a wetroom in Warrington or across Cheshire — including Altrincham, Hale Barns, Lymm, Knutsford, or anywhere nearby — make sure it's done properly from the start. The wet room specialist guide is the best place to begin, and the cost of doing it right is far less than the cost of fixing it later.
When water shows on the ceiling below
If water from a wet room is appearing through the ceiling below, I normally start with two possibilities: either there is a plumbing leak, or water is getting past the waterproofing system somewhere. If it is the waterproofing, the actual cause could be a failed junction, penetration, movement, poor detailing or damage to the tanking. The tiles and grout are the finish — they are not the waterproof layer.