Why I Use Tile Levelling Clips (And What They Actually Do)
If you've watched any modern tiling work, you've probably seen small plastic clips positioned on top of tiles as they're laid. These are tile levelling clips, and they're one of the most important tools I use to ensure a professional, flat finish across Warrington and Cheshire.
Many DIY installers and budget tilers don't bother with them. But here's why I do — and why you should expect them on your project. For context, understanding what affects the cost of professional tiling helps explain why this extra step is worth it.
What Are Tile Levelling Clips?
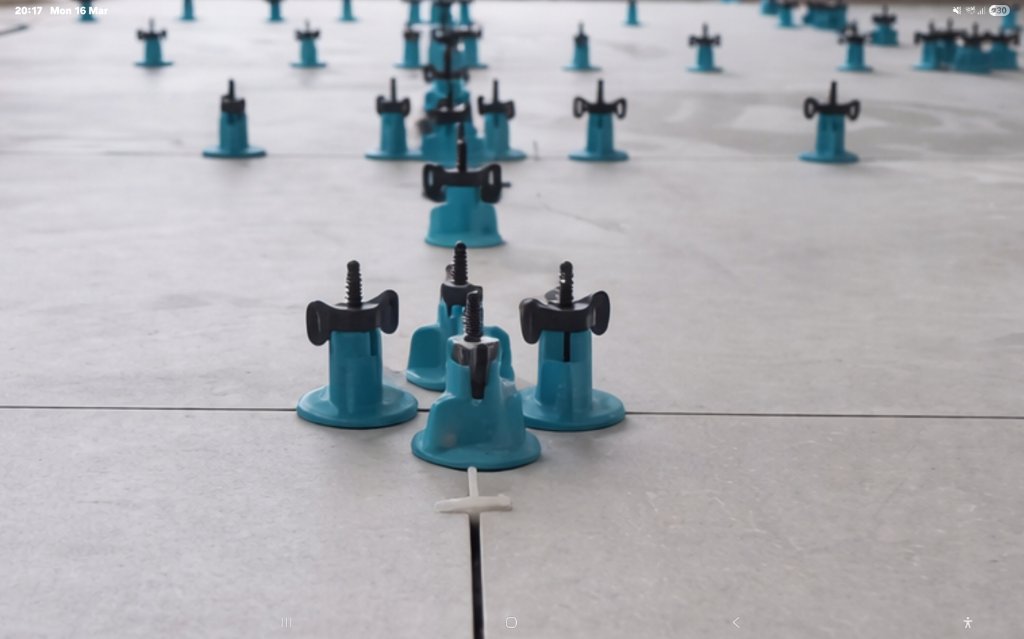
Tile levelling clips (also called lippage control clips) are small mechanical devices that hold adjacent tiles at exactly the same height while the adhesive is setting.
They work by:
- Sitting on top of two adjacent tiles
- Using a wedge system to ensure they're at precisely the same level
- Preventing one tile from sitting higher than the other (called "lippage")
- Being removed once the adhesive has cured (usually after 24 hours)
Why Lippage Matters More Than You Think
Lippage is when tiles sit at slightly different heights, creating visible lines or steps across your floor or wall.
A small amount of lippage (even 2-3mm) becomes very obvious:
- When light hits the surface at an angle
- Underfoot if it's a floor (safety concern)
- Visually jarring when you're looking at the installation
Modern large-format tiles make lippage even more noticeable because the eye travels further across a flat surface. This is why self-levelling floor preparation before tiling is so important — levelling clips then maintain that flatness during installation. I use this approach on every floor tiling project in Warrington and across Cheshire, especially for large-format porcelain installations.
Why Manual Methods Aren't Good Enough
You might think careful tapping with a rubber mallet is enough. Or relying on the thinset mortar to self-level.
The reality:
- Tiles can shift slightly after tapping
- Different tiles sit differently depending on how thinset is applied
- Vibration during work can cause slight movement
- Relying on the installer's eye isn't reliable across large areas
Levelling clips take the guesswork out. They physically hold tiles at the same height, guaranteed.
The Professional Approach
Here's what I do on every job across Warrington, Altrincham, Knutsford, Wilmslow, and throughout Cheshire:
- Apply thinset to the substrate
- Set each tile carefully
- Insert levelling clips to hold tiles perfectly level
- Check levels using a laser level
- Allow to cure completely (usually 24 hours)
- Remove clips once adhesive is fully set
- Grout with precision — epoxy grout where appropriate
This approach takes more time and materials, but the result is a perfectly flat installation that'll look professional for decades. For more on large-format floor preparation, see the large-format porcelain floor tiling service.
The Cost-Benefit
Levelling clips cost just a few pence per tile, but they:
- Guarantee a flat finish
- Reduce the need for rework
- Make grouting easier
- Create a professional appearance
- Prevent safety issues in wet areas
- Last longer visually because they're properly installed
When They're Essential
Levelling clips are non-negotiable for:
- Large-format tiles (anything over 300x600mm)
- Polished or glossy finishes (where lippage is very visible)
- Wet rooms and bathrooms
- High-visibility areas
- Any installation where quality matters
The Bottom Line
If your tiler isn't using levelling clips, that's a red flag. They're not expensive, they're not optional, and they're the difference between a good installation and a professional one.
At Paul the Tiler, every job gets levelling clips as standard. It's one of the ways I ensure that your tiles look perfect for years to come — whether that's a bathroom in Altrincham, a kitchen floor in Knutsford, or a large open-plan space in Warrington.
Real Examples From Recent Projects
Job Example 1 — Commercial Space, Warrington
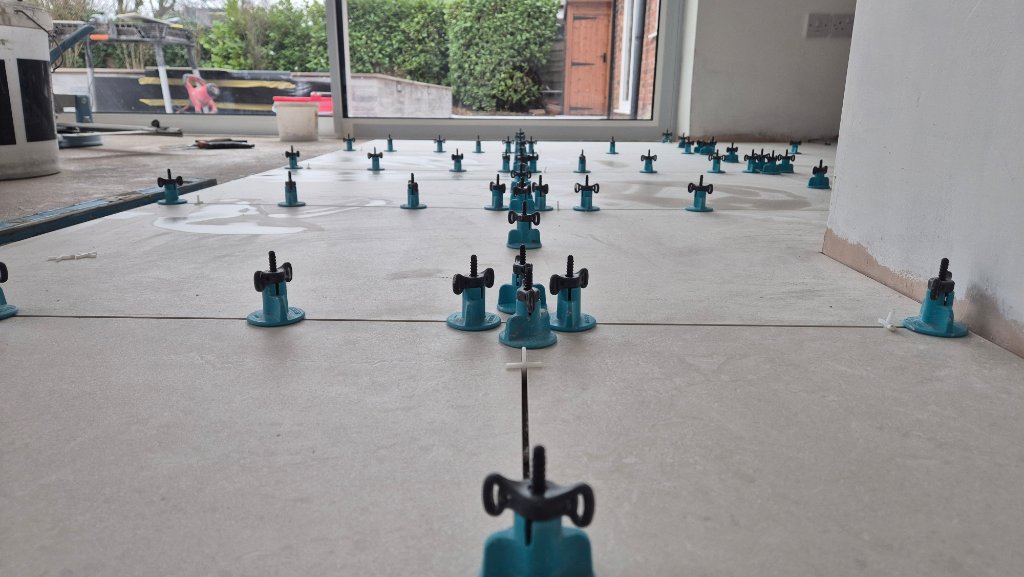
Setup: 45m² floor with large-format porcelain. Levelling clips installed systematically across the entire area to ensure consistent height at every joint.
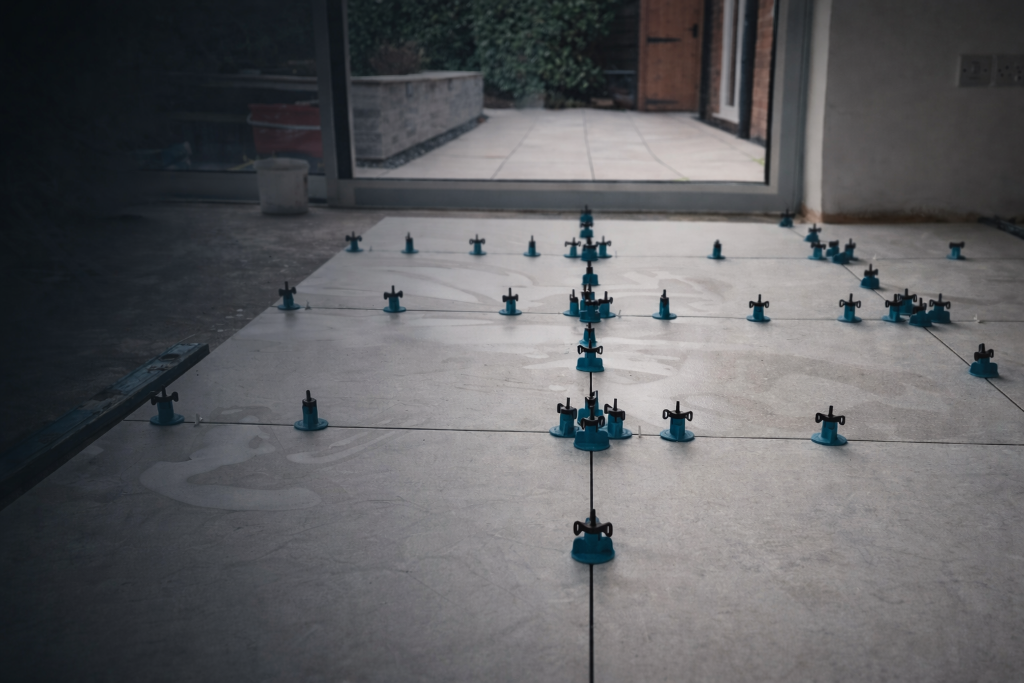
Spacing: Clips positioned at regular intervals throughout. Every tile locked at the correct height before adhesive sets.
Job Example 2 — Residential Installation, Cheshire
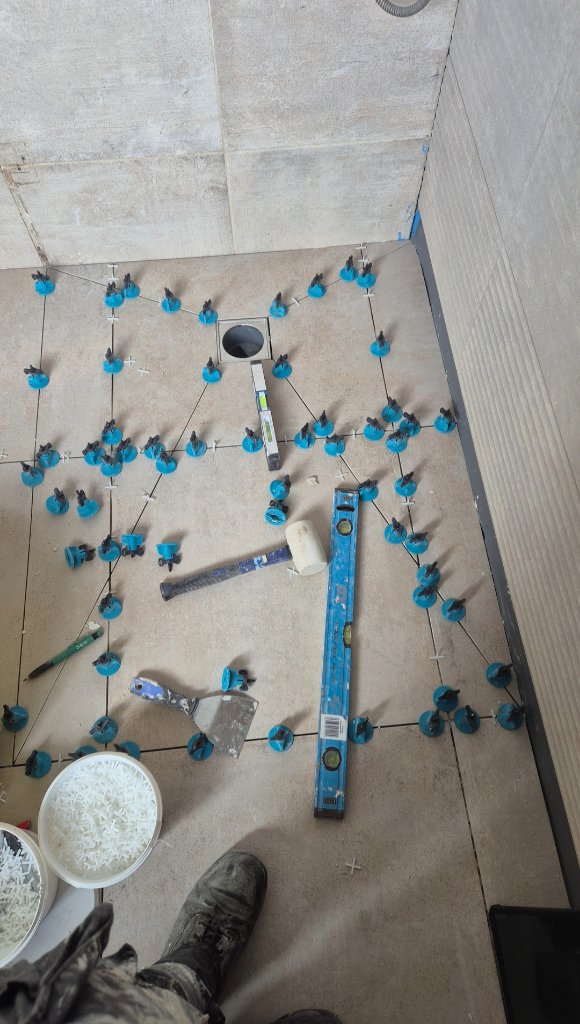
Detail: Each clip wedges adjacent tiles to exactly the same height. No rocking, no adjustment needed after tightening.
Result: Perfectly flat installation ready for grouting. This precision is what separates a professional finish from a rushed job.