
Latex / Self-Levelling Floor Preparation Before Tiling
- paul finn
- Jan 16
- 3 min read

Why Getting the Prep Right Matters
When it comes to floor tiling, most problems don’t come from the tiles themselves — they come from poor floor preparation.
One of the most important stages before tiling any floor is latex floor levelling.
This is the difference between a flat, long-lasting finish and tiles that crack, lip, or fail over time.
What Is Latex (Self-Levelling) Floor Preparation?
Latex floor levelling involves applying a flexible, cement-based compound to the subfloor to create a perfectly flat and stable surface before tiling.
It’s commonly used on:
Concrete floors
Screeded floors
Timber floors (with the correct preparation)
Underfloor heating systems
The latex content allows the compound to flex slightly, which is essential for modern homes where movement is inevitable.
Why Latex Floor Levelling Is So Important Before Tiling
Large-format tiles, porcelain floors, and modern layouts demand flat surfaces.
Even small dips or high spots can cause:
Lippage between tiles
Hollow or loose tiles
Cracked grout lines
Premature tile failure
Latex floor levelling ensures:
Tiles sit fully bedded
Even grout joints
Clean lines and professional results
Long-term durability
Skipping this stage is a false economy.
When Is Latex Floor Levelling Needed?
Latex levelling is recommended when:
The floor isn’t flat within tolerance
Old adhesive marks remain after tile removal
Floors have been patched or repaired
Large-format tiles are being installed
Underfloor heating has been fitted
In many homes, some level of floor levelling is unavoidable if you want a quality finish.
Latex vs Traditional Screed – What’s the Difference?
Traditional sand and cement screeds:
Are rigid
Take longer to dry
Are not ideal for thin tiling build-ups
Latex / self-levelling compounds:
Are flexible
Dry faster
Can be applied thinner
Are ideal for tiling
For most residential floor tiling projects, latex levelling is the safer and more reliable option.
Correct Latex Floor Preparation
Proper latex floor preparation isn’t just pouring compound onto the floor.
It includes:
Assessing the subfloor type
Mechanically cleaning the surface
Applying the correct primer
Mixing the compound to manufacturer specifications
Pouring and spreading evenly
Allowing sufficient curing time before tiling
This approach is used on many of my floor tiling projects in Warrington.
Done correctly, latex levelling creates the perfect base for high-quality tiling.
Latex Levelling for Large-Format Tiles
Large-format tiles are unforgiving.
Any unevenness in the floor will show immediately once the tiles are laid. This is why latex levelling is essential, not optional, when installing modern porcelain floor tiles.
A flat substrate allows:
Full adhesive coverage
Reduced stress on tiles
Cleaner grout lines
A superior overall finish
A Professional Approach to Floor Preparation
Latex floor levelling is one of those stages where experience really matters. Every floor is different, and using the wrong product or skipping steps can lead to costly problems later on.
Proper preparation ensures:
The tiling lasts
The finish looks right
The investment is protected
Final Thoughts
If you’re investing in new floor tiles — especially porcelain or large-format tiles — latex floor levelling is one of the most important stages of the job.
It’s not always visible once the tiles are down, but it’s the foundation everything relies on.
Getting the prep right is what separates a floor tat looks good on day one from one that still looks good years later.
Tiling in Warrington & Cheshire
Call for your tiling project 01925 899755
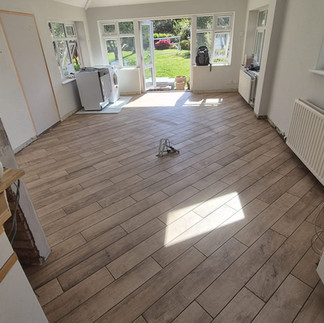
This Project involved full latex floor levelling befour tiling, creating a perfectly flat base for tiling a finished floor. Click HERE to see the case study.


Comments